 After having a huge projection television in our family room, we were looking for a super clean look that would allow us to hide all of the necessary wires from view and enable simple cleaning around the audio/ video products without having to play musical chairs with our furniture.
Prior to buying anything, I usually perform a lot of research online, reading reviews from both the Pros and more importantly, people like me that buy the products to use themselves.
While shopping online, we had selected this 6 foot long mostly glass TV stand that looked pretty nice. Although we had just ordered a 52" LCD that we intended to hang on the wall, we felt as though we were still burdened with this large piece of furniture to place our audio products on and I was not in a financial position to have professionally installed wall and/or ceiling speakers. I had selected this product that was manufactured by Sanus Systems. Prior to ordering, I went to the Sanus website to check one more time. This is when I noticed a new product called Wall-Mounted Vertical Series. This was exactly what we had been looking for but thought it had not yet been invented.
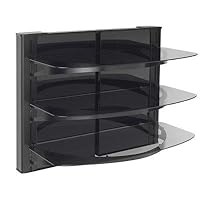
We bought the Sanus Systems VF-5023 three shelf wall system. This unit is perfect. The person that designed this is a genius. Not only does it look great, allow plenty of room around the unit to clean, keeps all wires completely hidden from view, holds 75lbs per shelf securely and offers two back-ground looks between black glass and a Cherry wood back ground, both of which are beautiful. We absolutely love this shelf system for our components. Since we hung our new 52" LCD above this rack, everything looks as though it was designed for our home.
Now the bad news! The instructions included absolutely suck. They offer cheaply drawn pictures and no written instructions, which leave you wondering "What the heck" and "How on earth am I suppose to assemble this". But have no fear! This rack system is so great and beautiful; I give it a full 5 Stars even with the lousy instructions. The main thing to remember when putting it together is this; 1) assemble the entire outer portion of the rack before you attempt to hang the two super strong brackets that hold everything on the wall, and 2) pick your background (Black Glass or Cherry Wood) before you install the actual shelves and start putting your components on them and slide the decided upon background pieces in place, allowing them to slide down and rest on the floor. Otherwise you'll be undoing everything you did after you realize you can't fit the backgrounds in after your components are in place.
Summary: This hanging shelf unit really is worth the trouble it takes to install using such bad instructions. Don't allow my installation comments to discourage you from buying it, because you'll love it once installed. 5-Stars Plus!!! You might say a few choice words while trying to figure out where to place to brackets to hang this unit. Check this unit out before buying any other type of TV stand/ AV component shelf.
Additional Info: In order to keep all of the wires hidden from view, I installed an additional electrical outlet behind where the actual wall unit was going to be hung. This was to enable plugging in the Power Surge unit that would be hidden behind the wall unit because I didn't want this big heavy cord showing below my fancy new wall unit.
Thanks to Sanus and this new wall unit, my entire system looks awesome!

Aside from the instructions, the unit itself is very nice. The quality of the material is very good. The satin finish on the metal blends in beautiful with my components and TV. I really like the tinted glass shelves, the curved shelving supports, and you get to choose if you want the backing as glass or a faux-wood finish. I chose the glass. It looks classy.
The cable organizing gives you a lot of room. I didn't quite realize how much room I would have to organize cables when I ordered it. You can place a power strip behind the back panels, so you completely hide all your power cords. I was actually fortunate enough that the wall outlet was below my TV, and this covered the wall outlet, so you don't even see that. There is even enough room that the huge power brick from my Xbox 360 fits behind the panels. I have one of the old 360's, so it is a rather large power unit. I don't know if the new style 360's have the same one, but there is room for it, in any case.
The only problem I ran into was one of the set screws that locks the shelf supports in place shattered on me. The material for the set screw is very hard. I tried removing it with an screw extractor, and the bit wouldn't even drill into the screw. That left top shelf permanently locked in place, so if I don't like where it is, I'm a little SOL. I called up SANUS about this, and they are sending me out a new side rail, new set screws, and a new bracket free of charge. Their instructions may suck, but their customer support is top notch. They are even in the US, with native speakers (not Inida "Native speakers"). They were a pleasure to speak with.
I'm actually going to recommend the two shelf model to my girl friend for her new apartment. She doesn't have a need for as much as I do, so it will fit her just fine. I have a feeling I'll be putting another together soon.
Buy Sanus Systems VF5023-B1 Dual Column Wall-Mounted Furniture Component with 3 Shelves Now
Ok so the product is fine. Wider than most I had seen.The instructions are horrible. Not bragging but I have worked on cars my entire life and have built houses and worked on many different technical projects. My father in-law was a Master Sargent in the Motor pool in the Air Force. Together it took us 3.5 hours to put this thing together.
There are 20 pages of instructions and 17 languages of instructions but not one of the paragraphs tells you how to put the thing together. There are pictures but no words. You don't know which plate to put on the wall first. The pictures actually show you how to put the mount for the shelves together backwards then you hang it on the wall but it doesn't tell you that in one single place you just have to figure it out. You don't put the bottom plate on the wall until the top plate and assembly parts are together then you screw it in the wall after. The actual shelves are held up by tiny 1/8 inch set screws that are hex, which in itself is not bad. However, while tightening the set screws half of them shattered while installing. Oh and they were supposed to hook into the brackets while in the groves but the groove wasn't deep enough to work so you have to use a rubber mallet to push "help" them into place.
Now that it is finished it does look good on the wall. I gave it one star because it is really difficult to put together. Well written instructions and it would be fine but buyer beware. I had read some issues with the instructions by other users but they were not joking. You need to be extremely handy to do put this thing together.
Good LuckI have four 65" TV'S AND 3 of THESE WALL SHELF MOUNTS. All the other 'wall shelf' units on the market mount onto 1 stud, or 2. This BABY CAN GO ONTO 3 Studs If Needed, as I USED 3. I wrote some personal tips for those of you needing help on mounting, as the instructions can leave some 'openness' (also due to it's adjustment play).
The directions show you how to backwardly put the unit together, but they are important and substantially better than none at all.. i followed them w/ somewhat ease and success. Most people on Amazon showed pictures of mounting the unit way below the tv.. allowing for a wall gap to be seen between the Sanus and the Bottom of the TV. I rather BUTTED the wall shelf directl to the bottom of my TV.. it looks cool this way, like the TV and Wall shelf are all one piece. Also, this enabled me to put the cables from the TV right into this wall shelf without seeing wires come from the TV.
If you do it this way, make sure your TV is tilted all the way down during the wall shelf installation... so that it's at it's lowest point when you butt the sanus frame up to it during installation. The other way people did theirs is to drill a hole behind the TV to drop the power and hdmi cable down.. and into the wall shelf area in a secondary hole (I avoided this). Either way, this unit is Sleek, and Rare Looking... it can hide an xbox power box, a surge protector, remote outlet plugs, and more.
Read the directions in pre-assembling this unit... you basically put your TV up on the wall first, then frame w/ bluepainters tape (or a pencil) WHERE YOU WANT THE WALL SHELF TO BE ON THE WALL, according to the measurements listed in paperwork. ALSO, find the wall studs and MARK THE CENTERS OF THEM where the Sanus shelf is going to attach to before anything. Use a stud finder. I also pierce the wall stud areas with nails to identify the exact 1.5" width of each 2by4, and putty the search holes.
Then, you put the entire Sanus FRAME ONLY together per the instruction manual (I did mine on top of my king sized bed) w/ out the shelves and glass pieces. The next step is that you want to have the wall mount bracket attached to the assembled frame, but your only going to be working on the top wall mount bracket FIRST (and both will be loose in it and can fall out if tipped in the air). There are 2 screw locks Sanus gives you for the bottom wall bracket w/ all completed, but you want to borrow those for now on the TOP bracket, and screw them all the way into the top bracket to help hold it to the frame. NOW... hold the entire frame up on the wall exactly where you want it (it's heavy, maybe 60lbs) and mark w/ a pencil (only top wall mount) the mounting holes of the top bracket that align according to the pencil markings that are on your wall that you made earlier for the stud centers.
Put the frame back on your bed or floor. You should see your markings on the wall. Remove the top wall mount bracket from the sanus frame... and now put that 1st TOP wall bracket permanently all alone on your wall, making sure it is on your markings, and that it is also level w/ your TV once more. But, if you measured everything up till now, it should be right on. (I chose to BUTT my sanus wall shelf up to the bottom of the TV to use the first shelf for a center speaker (martin logan motion 8).
Now that you have the top wall mount permanently on the wall... put the assembled frame onto the wall by now hanging it on that top permanent wall bracket.
THIS IS a TRICKY PART... Now, while the entire sanus frame is on your wall hanging on your permanent TOP wall bracket... mark your holes for the bottom wall plate (make sure they align with your pencil markings that identify the stud centers), BUT MAKE SURE TO LIFT THE BOTTOM PLATE SLIGHTLY UPWARD ABOUT AN 1/8 OF AN INCH SO THAT THE FRAME RESTS ON THE TWO BRACKET 'LIPS' AND IT BUTTS UP TO THE FRAME (BECAUSE OF THE PLAY INVOLVED... the manual misses this point of precision). You can now drill the holes for the bottom plate w/ the unit in place.
Now, you can put the back glass pieces in (they actually can pop in sideways, and DO NOT NEED TO SLIDE IN FROM THE TOP OR BOTTOM.. (EXCELLENT PLAY), and use the two screw nobs on the bottom of the sanus frame to now permanently lock it onto the wall. INSTALL YOUR WIRES, and then put the shelves in w/ a long level across them (heights are to your adjustability)... Your DONE.
SIDE NOTE: The sanus frame has to be lifted about a 1/2" up over the wall bracket lips to rest on them... if i tilt the 65" Plasma TV upward to the ceiling.... I CAN ENTIRELY REMOVE THE SANUS SHELF IF NEEDED TO WHILE THE TV IS ON THE WALL, EVEN THOUGH THE TV BUTTS UP TO THE SHELF DURING TV Flat, or down POSITIONING. The Sanus shelf just has superb built in play in it's lucky design.
Want Sanus Systems VF5023-B1 Dual Column Wall-Mounted Furniture Component with 3 Shelves Discount?
Once I got a good look at the almost "wordless" installation instructions (pictures only) I was a little intimidated. But, once you begin putting together the main framing, everything else pretty much falls in place. I've included a few pictures of the final outcome. There are no wires showing because I drilled a two inch hole in the drywall behind the TV, and another 2 inch hole behind the Sanus shelf system. You will want to put together the main framework first, before attaching the upper wall mount. This will give you a better idea of how high to place the 1st (upper) wall mount. The lower wall mount fits in the bottom of the framework and aligns the mount to the wall before screwing it in. You will need to fasten the wall mount bolts to studs because this system is pretty heavy. The good thing is, once you mount the framework to the upper wall mount, you can then slide the framework up to 4 inches to the right or left. This unit makes for a very clean look and has enough space between the glass covers and the drywall to fit a surge protector and all of the wires. I'm very happy with the results and have absolutely no regrets.Save 22% Off
No comments:
Post a Comment